Review: Sonos Playbar
We got our hands on Sonos’ take on decent sound for your flat panel TV in the shape of the recently launched Playbar, which - as the name suggests - is a soundbar. Playbar is Sonos’ first dedicated attempt to mix their well-known wireless music system with the world of television, and compared to the competition Sonos offers the possibility to expand the setup to a wireless surround system by hooking up Play:3 and Sonos:SUB. In this review we take a look at the complete setup.For those of you out there who doesn’t know Sonos, we are dealing with a manufacturer that specializes in wireless distribution of music within your home. And they have done a good job so far. Sonos has been around for quite some time and their line-up consist of a number of units that are capable of streaming music in various forms such as Spotify, Juke, Aupeo, Tune-In, or files stored locally on your network attached storage (NAS). The system has won the heart of reviewers due to its user-friendliness, including the solid app for controlling everything from your computer, smartphone or tablet. We’ll address this later.
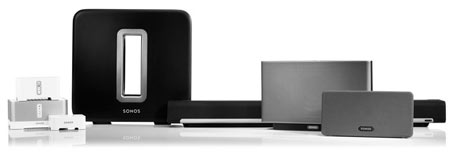
We gathered up the complete Sonos family for this review.US retailer
DE retailer
UK retailer
HDMI Optical SPDIF Ethernet USB
Analogue input Dimensions (HxWxD): 85 mm x 900 mm x 140 mm Weight 5.4 kg In the box Optical cable
User guideFirst impressions
The wrapping of a Sonos product is just a tad more delicious than what you might be used to when unboxing electronic gadgets (except maybe if you own something from Oppo and to some extend Apple). The wrapping is something often overlooked in the AV world but somehow you’re set off for a better start if everything is boxed up nicely.
The wrapping is the usual nice Sonos quality.
Playbar itself is made from semi-soft plastic covered mostly by speaker fabric. Two metal shins hold the IR input and repeater as well as the logo (which - by the way - looks the same no matter which long edge is up). The weight is as you would expect from a speaker holding 3 sets of 3-way units with accompanying amplifiers - and it feels sturdy.
As with the rest of the Sonos line-up the number of buttons on the Playbar is limited to three: Volume up and down, and a mute button. You will find no standby or power button as the system automatically enters hibernation upon inactivity. Configuring the Playbar is done solely using a dedicated Sonos controller (extra), a computer, or an App for your tablet or smartphone. To pair a device with Playbar simply press and hold the mute and plus button on the side of Playbar while searching for Sonos devices from your controller.Around back you’ll find two ethernet ports, a power line, and an optical SPDIF input for the sound connection. There is no HDMI interface to allow for ARC connection, so it is essential that your TV has an optical output. We will get back to the limitations due to this later on. The dual ethernet port functions as a HUB to let you loop e.g. your NAS drive through Playbar or to connect you PC to your LAN.
Volume buttons on Playbar.
Connection around back.
Playbar can either stand on a table or hang on the wall (using e.g. Sonos’ own bracket) and no matter what you decide the projection of the sound is adjusted automatically. For wall-mounting two holes at the bottom acts as mounts for flathead screws, but unfortunately you can’t screw anything into the mount to attach it using e.g. typical soundbar mounts for your TV’s VESA connections. The feet at the bottom are fitted with rubber for better grip and considering the weight Playbar will sit safely on you TV furniture or bookshelf.
Mounting holes are placed in the bottom.
Beneath the hood you will find a three piece speaker consisting of nine units distributed along the speaker - three for each group in the speaker. Playbar is designed to deliver a pseudo surround effect when used by itself, and to give you the feel of the surround sound two of the tweeters are placed in the corners of the Playbar spreading the sound. The speaker units are driven by class D amplifiers, which ensure a high efficiency as well as low power consumption.
Volume buttons at the end of Playbar
As Sonos is network operated you won’t find an IR remote control anywhere in the package. This is a bit impractical when it comes to TV operation as you wouldn’t want to grab for your smartphone every time you need to adjust the volume, so Sonos has built in an IR receiver and IR repeater. The first is capable of receiving the IR signals of your TV’s existing remote and the latter is meant to re-emit the signals in case you have placed Playbar in front of your TV’s own IR receiver. This means that the volume of Playbar can be adjusted using your existing remote once you have taught it what to respond to.
The IR receiver is the small black window at the top.Before we begin
Our test setup already contained some Sonos equipment, such as the Sonos Bridge (wireless access point), a Sonos Connect (for connection with active speakers or your own amplifier), and a Sonos Play:5 (big brother of the Play:3). For local storage we used a Synology 4-bay NAS, and for online streaming we used Wimp (pretty much like Spotify but with better interface on Sonos) and Tune-In radio.
It should be noted that Sonos gives you the most freedom if you run in wirelessly (it can be hardwired if you prefer), and to do so at least one unit must be hardwired to your router. From this single hardwired unit Sonos sets up its own wireless network solely for other Sonos units to access. If your router is nowhere near your Sonos equipment you can use the Sonos Bridge, which has the sole purpose to set up the wireless access point you need to connect all your remaining units. Bridge must be bought separately.
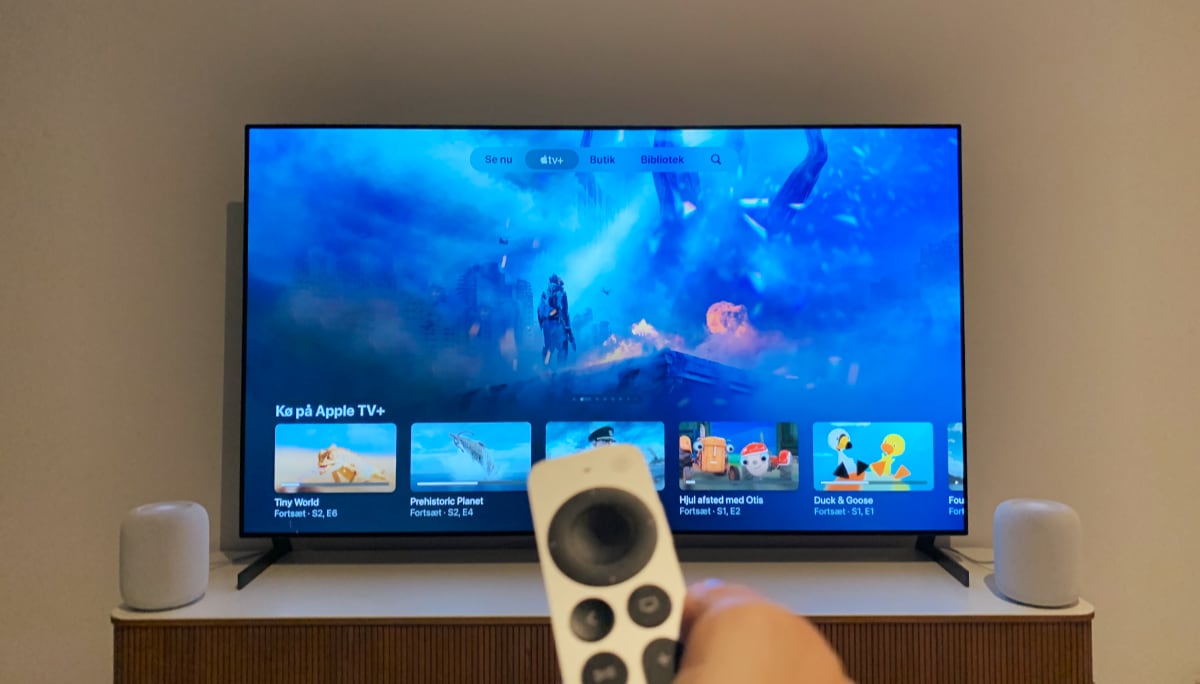
We have tested Playbar on a Pioneer LX5090 in connection with an STB, several media players and a Sony S185 Blu-Ray player.Functionality
Setting up the Sonos Playbar is simple. Plug in the power cable, connect the optical input to your TV’s optical output, and plug in the network cable connecting Playbar to your router (in case you don’t own a Sonos Bridge). To get sound flowing through the speakers you need to do some initial setting up software-wise, which is done through e.g. your smartphone, tablet, or computer.
Setting up Playbar can be done from your smartphone, tablet, or computer.
During our test we used an iPad to get Playbar going, and the Sonos controller App guides you through the setup once you have paired your device with Playbar (to ensure that someone outside your home don’t take control of Playbar). The pairing is done be pressing the “+” and “Mute” buttons simultaneously on the side of Playbar. The guide prompts you to point your TV remote at Playbar and press the volume buttons, which will then teach Playbar to respond to that particular button when adjusting the volume.
The next step is to turn off your TV’s built-in speaker, so you don’t have two systems competing to deliver audio. Depending on the make of your TV the procedure for doing this will be different (on the Pioneer you couldn’t so we disconnected the speakers). This step is the major disadvantage compared to the more popular HDMI-ARC connection that most new TV’s are equipped with. Sonos has explained that SPDIF has been chosen to make things easier to set up for the user, and even though we do acknowledge that SPDIF is more of a plug’n’play connection that HDMI-ARC to begin with, the ease kinda vanishes once you try to turn off the internal speaker of the TV. We guess it is a “win some, lose some” situation.
At the present time we have read about users complaining about Playbar not recognizing the volume buttons of their particular TV set, so it might be an idea to test this out for yourself in a shop before buying a Playbar.
Once Playbar has been properly installed it is extremely simple to use. The volume adjusts up and down (hopefully) as it normally would using your regular remote, but it can also be fine-tuned using the controller App for your smartphone or tablet. Notice that Playbar doesn’t have a volume indicator anywhere besides a small diode that blinks when you adjust the volume. You need to open the controller App to see the absolute volume level.When it comes to music streaming Sonos is on home turf. The Sonos App has set the bar for music integration for many years and you will find an excellent integration with online streaming services such as Spotify, and of course your local collection of music. You can distribute your music between all connected Sonos devices, pair rooms, or simply play whatever you like in each room individually. Once you have tried the ease of putting together a playlist from Spotify and sending it to all rooms of your house you will soon get addicted. The controller App has been tested on PC, Android, and iOS (several tablets and phones) and the experience is excellent on all of them.
If you have other Sonos devices these can swiftly be paired in the controller App.
We used the streaming service Wimp during our testing, which has its own menu inside the Sonos App (as do all the other supported services).Power consumption
Playbar doesn’t have an off-button and will automatically enter hibernation when not in use. To allow for quick activation some of the essential internals must be kept alive, and the WIFI-connection is one of them. This increases power consumption.


 | |
| Stand by | 6.4 W |
| In use | 11.4 W |
During standby we measured 6.4 W, which quite a lot for a piece of electronics, but we doubt that this can be reduced significantly as you simply need to keep certain parts of the speaker awake. What you lose during standby you will, however, gain during operation, where the class D amplifiers makes sure that the power consumption is a measly 12 W at a sound level appropriate for movie watching. Adding surround units (Play:3) and the Sonos SUB will of course increase this.
Sound quality
Playbar is designed to simulate surround using just one speaker, which is achieved by adding nine speaker units as described earlier. Sound is spread towards the sides and compared to pretty much any built-in TV speaker (B&O excluded) the sound performance is quite a bit better. “Surround” is probably not a word we would stick on the spec sheet, but you will get a more spacious feel and a far better bass performance that what any flapjack LED-TV speaker will give you.
For TV use the Playbar is a very welcome addition to our test setup, and even the not-so-tiny bottom mounting speaker of the LX5090 falls very short in comparison. Speech is clear (and you can even activate a “speech enhancement” in the controller App) and Playbar can even deliver enough punch to make explosions worth listening to and to fill your entire living room. Sonos doesn’t list the performance of the speaker anywhere, but unless you already own a home cinema system, which delivers a sound pressure level that can be felt in your gut, Playbar will probably satisfy most.

Playbar placed on the wall.
Playbar also lacks a bit of clarity in the high frequencies, which is easily spotted when listening to music. At the same time you will also notice a deficiency in the low frequencies which begs for a subwoofer to be added. Even when adding the Sonos SUB the setup doesn’t quite cut it as the sole source of sound in your living room, which makes the system a little hard to classify. Most people don’t have separate systems for music and movies. With Sonos you do have the possibility to add a Connect or Connect:Amp to your setup and group these with Playbar when you listen to music and this was also our preferred choice during the test.

The Sonos family counts several types of music units.
Surround connectivity
Before talking about how Playbar acts in a surround setup let’s quickly go through some of the limitation you are facing - the choice of SPDIF doesn’t come without a penalty unfortunately. SPDIF is an older standard, which is limited in both bandwidth and functionality. This means that the interface won’t handle HD sound and it cannot transmit or receive remote commands. These are problems you won’t face with HDMI-ARC, where both HD sound and soundbar control can be sent through your TV’s HDMI port.
Alright, so HD sound is out. How about old school surround then? Playbar only supports Dolby Digital and not DTS, so once again we run into limitations. In addition many TVs actually won’t let you pass through a DD5.1 surround signal from another source (such as you Blu-Ray player) if the connection is done via SPDIF, so quite often you will find yourself stuck with a downmixed 2-channel PCM track, which is no longer offering true surround. So from extracting a great high-def 7.1 channel HD soundtrack from your Blu-Ray player, you are now stuck with a 2-channel soundtrack. Granted - HD sound might not make that much of a difference on a soundbar, but 5.1 channel surround actually DOES make a difference if you want to add a set of Play:3 speakers and a Sonos SUB to the setup.
We have tested Playbar with a wide variety of sound formats and even though we take a swing at the 2-channel PCM input above things turn from bad to worse if you try playing back something encoded in DTS. This goes for DTS-MA (HD sound) and “regular” DTS surround sent through the SPDIF connection: You will get no sound at all if such a signal is passed to Playbar. So be warned: If you connect Playbar to anything capable of passing through a DTS soundtrack you will get no sound.

Playbar og Play:3.
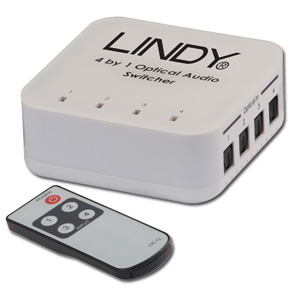
SPDIF switch.
Our LX5090 TV didn’t have a built-in digital tuner, so real surround could not be obtained by watching TV, but only when hooking up our media players or STB. We could, however, squeeze out the infamous 2.0 PCM signal, which gave us an opportunity to test out the virtual surround. You might have heard how 2-channel PCM is converted into surround before, as this is same kind of ninja stunt that older Dolby ProLogic receivers pulled in the early days. What you will find is that you won’t get complete separation between the front and rear speakers (or between each of the two rear speakers), which makes for a somewhat poor experience compared to what happens if you feed Playbar with a real DD5.1 signal.
The addition of the SUB often seemed unnecessary as it often became very dominant even at low gain setting. Of course this is a matter of preference and most people should find the SUB plenty capable of rumbling their living room should they fancy this. Where the SUB might seem too much during movie playback it is very welcome when it comes to music playback. When adding the SUB to the system you can hear how Playbar adjusts the crossover frequency and lets SUB take over the lowest frequencies. We really feel that the addition of SUB to the system lifts the listening experience, but still you will be stuck with the limited stereo perspective offered by the single Playbar speaker so it is hard to really recommend adding the subwoofer at this point.

Playbar and Sub

Play:3 is the only speaker currently working as rear speaker with the Playbar.
The competition
Playbar is by no means alone on the marked and glancing at some of the more interesting competitors you will find the B&W Panorama II (as mentioned above) and the Libratone Live. As we haven’t had any of these units around for testing, we will have to settle with a little spec comparison, which actually might not make it that hard to pick your own winner.

Libratone Lounge
Libratone Lounge has been launched as an AirPlay speaker suited as a soundbar, but as Libratone is constantly expanding their functionality, streaming is no longer limited to iOS units. The connection is made - as with Playbar - through a single cable (either analogue or optical SPDIF). You won’t find any surround (rear speaker connection) at the present time, but who knows what features the Libratone-guys might cook up for us in future firmware upgrades - or if Apple decides to expand AirPlay by themselves. There is no HDMI connection and the volume control is handled by your smartphone or tablet - no option for IR here. If you are streaming your music directly from your phone or tablet Libratone Lounge might be the perfect choice for you. One thing that is extra cool about the Lounge is that you can stream audio from movies and TV series wirelessly from the Apple TV box; during for example iTunes or Netflix video watching.

B&W Panorama 2
B&W Panorama II looks more like a traditional soundbar than Playbar and Lounge systems do. The connection to your TV is done through HDMI offering ARC, but on top of this you actually get a 3 port HDMI switch in case your TV doesn’t have ARC - you simply connect all you peripheral units to Panorama and run a single HDMI cable to your TV. You won’t get any surround connectivity either and no streaming of music is available unless you plug in e.g. an Apple TV/Airport Express or similar. Panorama II is controlled by its own IR remote.
You will find pros and cons with all of the mentioned soundbars, but if you only focus on the specifications it might be pretty easy to point out the one best suited for your needs as the functionality of the three systems are widely different. If you fancy the AirPlay universe Libratone Lounge seems to be the obvious choice. If you can see the benefit of having an HDMI switch built into you soundbar Panorama is a strong candidate. And if you like the Sonos ecosystem Playbar is the one for you.
Conclusion
Soundbars are hotter than ever due to the thin flat panel TVs we drag home. And the market for soundbars is more exciting now than it has ever been as the makers of soundbars are coming from very different parts of the electronics industry - with very different features as a result.
Sonos’ take on proper sound for your TV is exciting for several reasons. Not only will you gain access to Sonos’ multiroom experience with streaming services of various kinds, but you will also get a soundbar capable of providing wireless surround. By itself the Playbar delivers an experience superior to 99% of speakers built into flat panel TVs on the market today, and connected to a Sonos:SUB and a set of Play:3’s you will get enough punch to shake your living room in Dolby Digital surround.
Sonos has decided on an optical SPDIF connection instead of the more modern HDMI connection. This decision to bet on SPDIF has its advantages - but also drawbacks. We are not unconditionally thrilled about the choice and the lack of DTS support is quite unfortunate. The option still to control the system using your TV’s remote control is, however, a great feature.
As a music player Sonos is leading the pack on functionality, but is being held back by its compact size and limited stereo perspective. As secondary source of sound in e.g. a study or a kitchen the sound is adequate, but as an all-round system in a living room it doesn’t quite deliver - not even when adding the Sonos:SUB.
Gazing at the price tag you do get an awful lot of technology for a reasonable amount of money by choosing the Sonos Playbar, and we can certainly give it a thumbs up. If it had been packing a HDMI-ARC connection and had support for DTS we would have put a “highly recommended” sticker on it as well.


Features is assessed based on functionality (ports, format support, wireless audio protocols etc.) as well as the applicability.
User experience is evaluated on the basis of user friendliness, speed, realiability, build quality, choice of materials, and day-to-day use of the product.
Total score is weighted: 50% Audio quality, 25% Features, 25% User experience.
All scores are calculated based on a moving maximum target, defined by what we currently consider the best on market. Each score is then presented as a percentage. This means that a score will fall over time as new and better products set new standards. This allows you to compare product scores across years. A score of 100% in a given category means that it is consider the best available product in this category to date.
Click for a more detailed explanation of the score system and Awards.
Easy setup
Sonos multiroom
Good sound for TV & movies
Can be expanded to "surround"
Only SPDIF input
No DTS support
Sound lacking a bit for music
Cannot connect additional front speakers