Review: Raspberry Pi 2 (with Kodi)
We have taken the latest Raspberry Pi 2 mini-computer in for review with the intend to use it as a media player with Kodi (previously XBMC). Raspberry Pi was recently released in version 2 with a faster 900 MHz quad core processer and 1 GB of RAM, which should provide improved performance, including better video playback than its predecessors.
So how good is a small, inexpensive PC as a companion for your TV? Is it an alternative to the many dedicated media players available today? Join us to find out in this review.
Subscribe to our Newsletter, RSS, Facebook or twitter to receive notice when new reviews are online.
HDMI Optical audio Internal storage (micro SD card)
Ethernet
USB
4 x USB 2.0Component videoudgang Analog audio Dimensions (HxWxD): ~3 mm x 85,6 mm x 56,5 mm Weight 0,1 kilograms + power supply In the box Nothing except for a manual. You need to buy:
Power supply
micro SD card
Keyboard or IR receiverPrice and retailer:

| US retailer | UK retailer |
 |
First impressions
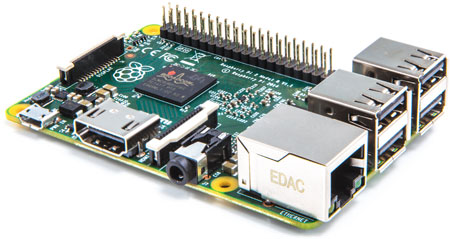
Raspberry Pi is DIY - do-it-yourself - that has countless applications. For the same reason, a media streamer is not the only thing it can do but just what we have decided to focus on. The default configuration of the Pi 2 is very raw. The Pi is actually just a very compact motherboard with a processor on top and lots of ports that point in every direction. It is up to you to put it in a cabinet, and connect a power supply and all the other units that you need for it to serve your purpose.
Our starter kit came with a power supply, SD card for storage, and a USB device for receiving IR signals from a remote control, called Flirc. Besides that the Pi was naked - no cabinet. On one of the sides we found a a LAN port and four USB ports and on the other side we found an audio output port, an HDMI port and a mini-USB port for the power supply. Furthermore, there is a mini SD port on the back side and various pins to connect almost anything you can dream of, including home-built accessories or maybe an HD audio board. Another possibility is to connect a physical power button because the Pi has none.
Test tools
We tested the Pi 2 with a Synology 4-bay NAS where we stored media content, including movies, music and video clips. Everything was shared via the NFS protocol. We examined media files stored in 1:1 from Blu-ray and DVD, and the same files compressed and stored in for example MP4 format. So we have full control over files and formats. The bit rates for the content ranged from a few Mbit/s to +50 Mbit/s.For the test we used a Pioneer LX5090 connected to the Pi via HDMI. The Pi was also connected to a wired 1 Gbit/s network (Pi only supports 100 Mbit/s).
Power consumption
The Pi is a PC, but a very small one, so power consumption is incredible low. | |
| Stand by | 0,2 W |
| In use (movie playback) | 2 W |
Idle or playing movies, even 1:1 Blu-ray rips, power consumption stays below 2.5 W, which is far less than most other media streamer boxes. Pi has no power button to shut it down (like typical PCs), but because of the very low power consumption you might just want to keep it turned on always.
A warning about using energy saving power strips or turning off the main power; don’t. The Pi is a PC so it needs to go through a power down process, like any PC. If you do not shut it down in orderly manner you might corrupt the operating system at some point as it might be in the process of writing critical data to the SD card when power is lost.
Set up
As the Pi comes without system storage it obviously also comes with an operating system pre-installed. There are many different options and for this test we have focused on the one them called "Kodi", also known as "XMBC" until recently.Kodi is available as a free version running Linux, and because a large community has craved a no-nonsense media center, there are also several specialized variants of Kodi out there - most are plug-and-play. Our SD card came with a clever little operating system selector that automatically popped up the first time we started up the Pi. From here you can select one of the Linux packages that are designed to work specifically with the Kodi software.
Since Pi 2 is brand new not every option was available so we chose to install the version called OpenElec.
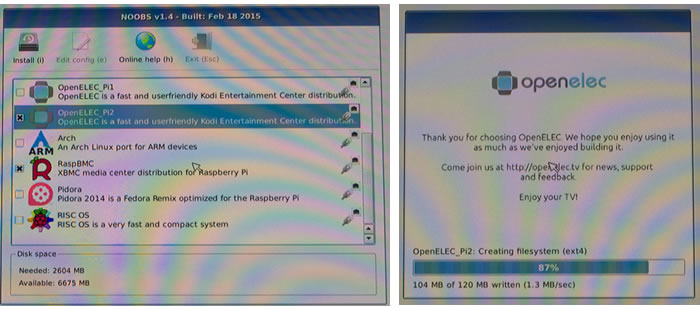
Installation took about 5 minutes. After this, the Pi jumped straight to the Kodi interface that you might have seen before - or as you can see below.
By now you can proceed to setting up network paths for your collections of movies, music and photos, and even connect a network tuner if you have one. One of the first things we did was to ensure that video playback was set up correctly. For some reason Kodi defaults to 60 Hz output and is not automatically changing the refresh rate depending on the refresh rate of the video. It is very unfortunate as most of the movies or videos you watch are not 60 Hz. In fact, almost every movie runs at 24 Hz - and in Europe 50 Hz is the TV standard. So we found the advanced menu and changed settings so that Pi 2 automatically adjusts the frequency according to the content. If you do not change this, your movies will stutter.

Setting Pi up and connecting it to the network was easier than on all other media players we have tested so far, since Pi automatically detected the network drive that were available on the NAS and network. There is no need to fiddle with NFS paths.
Our Pi also came with a USB dongle for receiving IR signals from remote controls, called Flirc. With this hardware you can make the Pi respond to almost any button from a remote and it was relatively easy to set up, too. It needs to be done from a remote computer before the Flirc is inserted into the Pi’s USB port. We coded commands from one of our other media boxes so we could use the remote from this box.
However, please note that the on/off button does not work with Flirc. The Pi also supports HDMI CEC so if your TV is compatible with CEC (most are) you can control it via you standard TV remote control.

There are add-on boards for Pi, which can serve as an IR receiver and that are able turn off the device, so depending on your needs, you might want to take a look at another option. One example is MSL Digital Solutions.
The Pi does not support HD audio formats per default. You cannot get HD audio from the HDMI port into your amplifier so you are limited to the 5.1 format, which might be disappointing for some home cinema enthusiasts.
User interface
It is difficult to say something definitive about the user interface of the Pi. There are so many options to customize it and download skins for Kodi that you can surely find something that fits your taste.
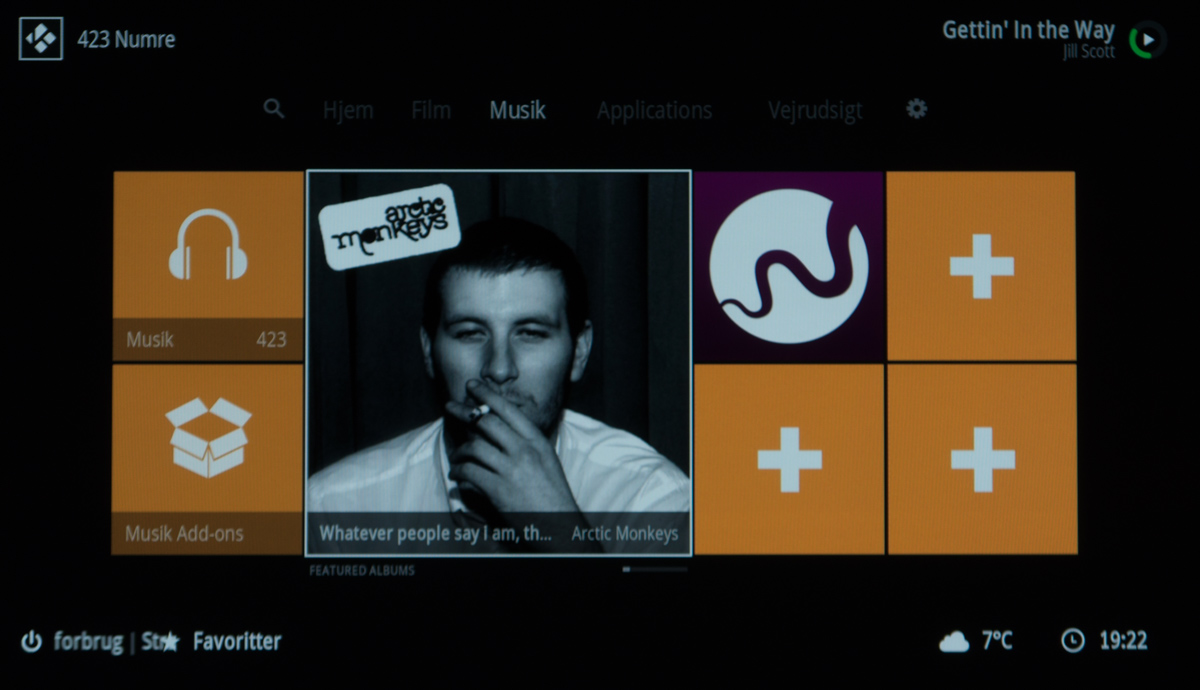
Not all interfaces are fully translated, so depending on your preferred language you might want to stick to one of the most popular choices - or just use the English version. We ended up using an Xbox look-alike skin that looked quite good. It was also easy and smooth to navigate with a remote control and an app.
Talking about operation, there are also several apps that can control Kodi via a phone or tablet screen, and we tried a few of them. From these apps you have access your entire movie and music catalogue directly on the mobile screen. Just press something and it will start playing on your TV. The apps are not very sophisticated (or pretty) but they usually get the job done. The best remote apps of Apple iOS will cost you a few dollars. Another limitation of the apps is that they are often unable to control the add-ons that you have installed, for example local streaming service "apps" such as Wimp so you will need to try a few before finding one that suits your needs.

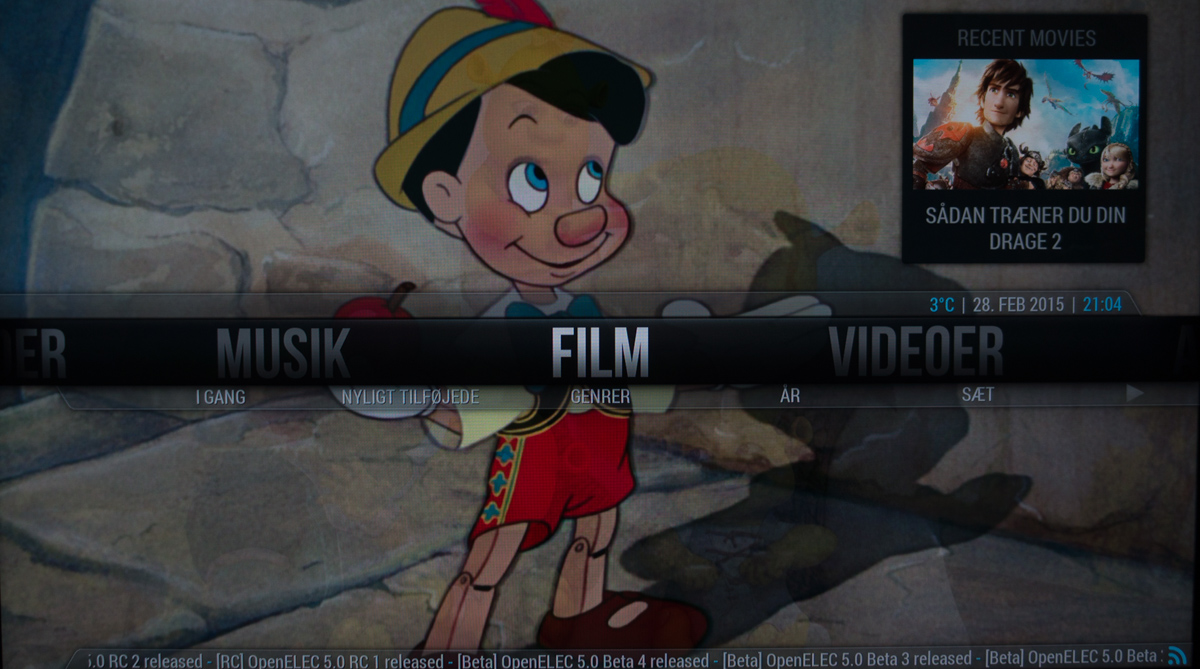
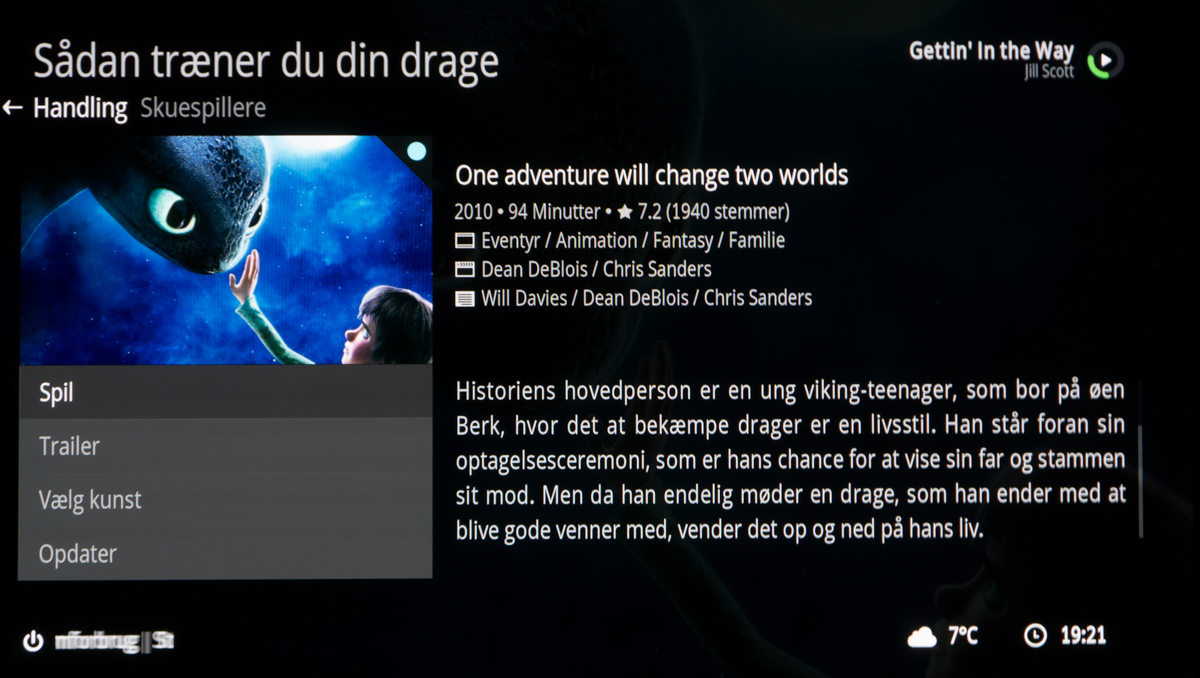
We have always had a penchant for "movie walls", or the kind of interface where you can select a movie by just pressing a cover. The movie walls will typically look different depending on the skin you are using, but it worked well and Kodi will automatically scan your library and pull down information on the movie or music album from internet sources.

It took less than 15 minutes from inserting the SD card the first time to having over 100 movies catalogued and loaded with information and covers. Not every movie was correctly identified, but it was easy to change things and replace for example covers.
Before enjoying movies, you might want to purchase the licenses for VC1 and MPEG2 as Pi 2 will not have hardware support for these formats unless you pay. The cost is a few dollars so it is money well spent to ensure a better video experience.
The Pi will automatically scan your music library (once it has been added), and Kodi will try its best to download information on every album. However, my music collection consists of several Danish albums and Kodi did not recognize these initially.
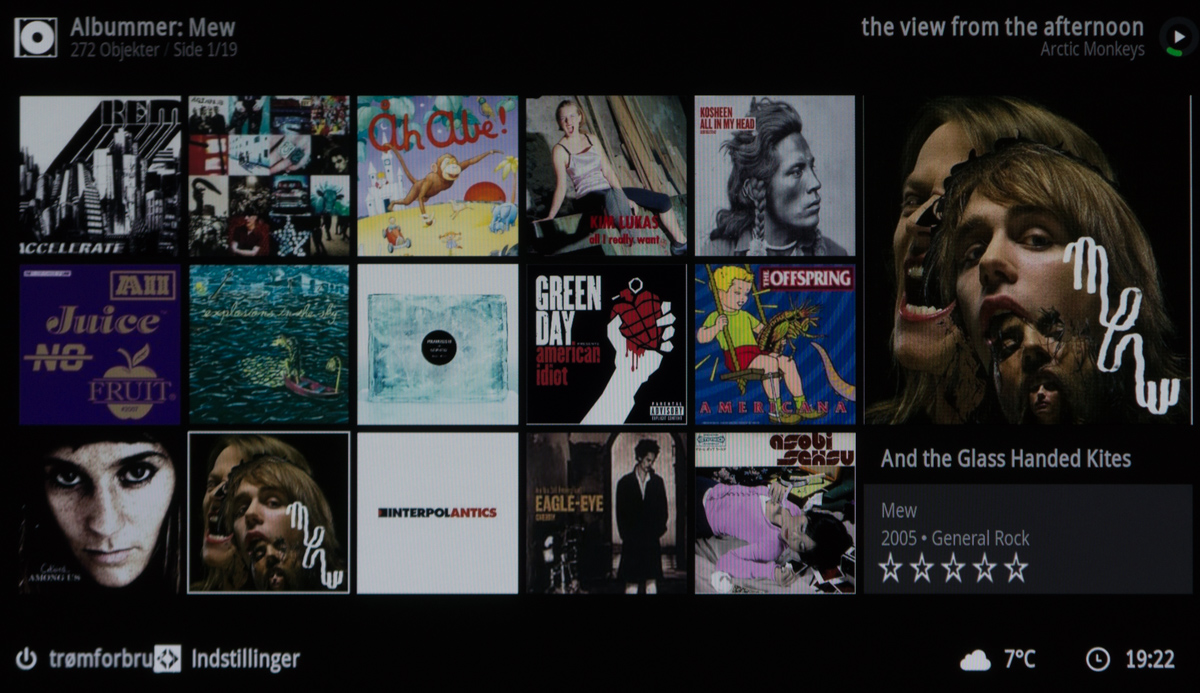
But since I have already spent time getting album covers for another setup and for use on phones are iPods, I could re-use the information.

On the other hand Kodi is not great for browsing family photos. You get a rather tedious folder structure, like on a PC, which is not exactly great – or motivating - for viewing photos. In addition, the Pi 2 struggled to load +20 Mpixel photos.
In use
As mentioned before, the user interface feels snappy and smooth. Our movie library consists of movies in several different containers, formats, and compressions; raw containers (ISO, MKV, BD structures etc.) to heavily compressed versions of MP4 videos. All videos started promptly and the frame rate was correctly identified. Playback was smooth and unproblematic.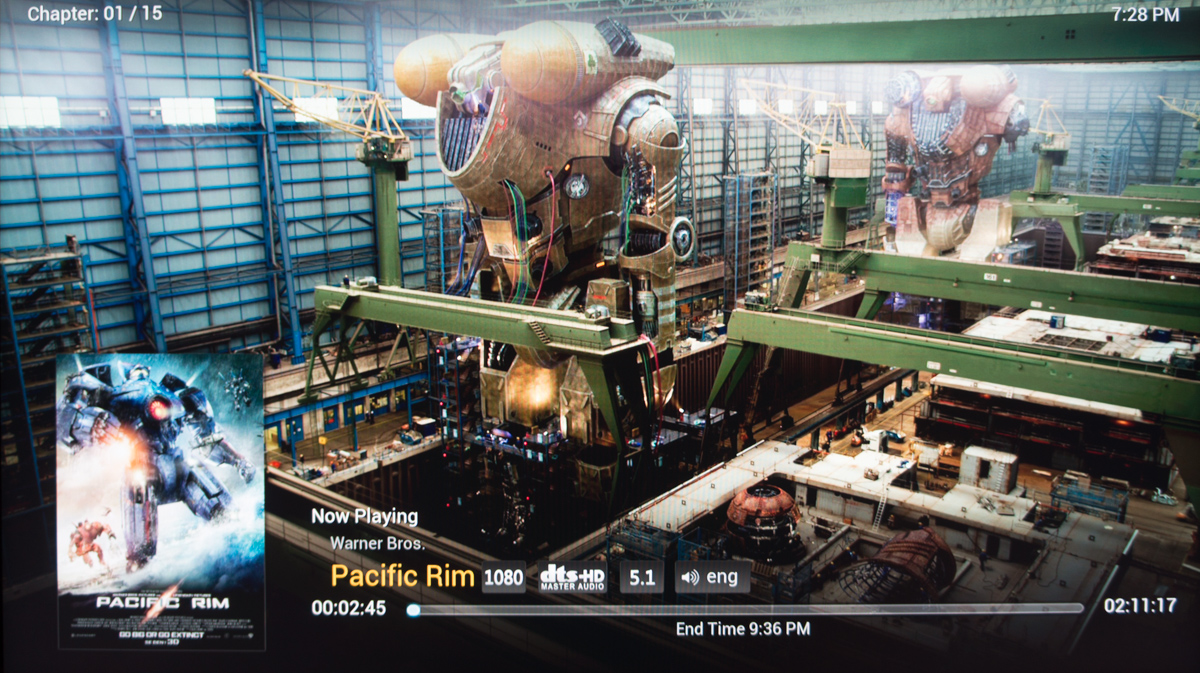
However, rewinding or fast-forwarding is problematic and the Pi simply could not keep in. Sometimes we also experienced hick-ups when jumping from chapter to chapter. Sometimes it would just freeze the video. It was actually much easier to control from the phone/tablet app that allowed us to easily jump to a different mark on the playback line.
We experienced some issues with the BDMV structure where Kodi was not able to change audio or subtitle track (the same files have been used on other media players that we have tested) so our recommendation is to use containers such as MKV for your 1:1 rips of BD movies. After re-packing our BDMV folders into MKV it worked without issues.
Occasionally, we observed how the Pi went crazy, speeding videos up to 2x for a short period - as if it was trying to catch up - and then switch to normal 1x speed again. We experienced this while using a DVD ISO image, but were unable to reproduce it on command so it is hard to identify the cause.
For some reason, the choice of subtitles and audio track is not saved, so every time a movie restarts your choices are overruled to default. It is not a big deal, but in for example animation movies my kids expect Danish audio and no subtitles, whereas we adults prefer the original audio track with subtitles. There is only one default setting for audio and subtitles.

The music playback interface is quite good and if you have the Pi 2 connected to an external audio system you can easily stream music from TuneIn radio or other services - or just your own music catalogue - and control everything from a tablet or smartphone. There are several add-ons that will provide access to music services. We mostly used Wimp and this add-on works pretty well on the TV and via the XBMC app on a tablet.
The user interface and experience is obviously not as fancy as the dedicated Wimp app, but it is possible to browse categories and playlists. It is not much different than for example Wimp integration on Sonos.
Kodi also supports IP-TV signals but since we did not have any way to test it we cannot comment. It is on our wish list so it is possible that we will look into the matter in the future.
In Kodi’s menu there is an option to enable Airplay, but unfortunately is it a bit of a bluff when using the OpenElec version, since the functionality has not worked for the last two generations of iOS. One of the Linux-based builds, which is also designed to run Kodi, called OSMC should have better support for Airplay, so if Airplay is a priority you might want to use OSMC instead of OpenElec - the installation is even simpler.
Apps – or add-ons
In Kodi apps are called "add-ons" and that is probably a more telling description anyways, since most really are extensions and not standalone applications. An add-on can add a feature, for example automatically scanning of a movie library in the background to make sure that it is always up-to-date, but it also allows you do other things like using streaming services such as Wimp.When using Kodi on Raspberry Pi 2 it is probably important not to think of it as a substitute to a media streaming box or Smart TV. It will not allow you to access any service such as Netflix, HBO or Amazon Instant. However, there is an add-on for YouTube.

The rest
We have focused on using Raspberry Pi 2 with Kodi, but to give you an idea of other uses it should be noted that it can serve many other purposes as it is basically a small PC in credit card format. Here are a few other popular uses for Raspberry Pi.Conclusion
Raspberry Pi 2 is more nerdy - or technical - than most other media boxes we have tested, but it can also be much more than simply a media box. It is a do-it-yourself solution that you can turn into many different things. Still, it is very easy to set up and after a few minutes it will act as a complete dedicated media box, in our case with Kodi (XMBC) as the media player software.Raspberry Pi 2 ate every movie and video format we threw at it from our NAS, Our issues with BDMV formats were the fault of Kodi, not the hardware. However, the hardware does not natively support HD audio.
Raspberry Pi with Kodi is not the all-in-one media box / smart TV solution that you have been waiting for, simply because the content providers do not support it so there are no official apps for most popular services, except those developed by a community of enthusiasts. And that is probably why Kodi is referring to them as add-on instead of apps. There is no access to Netflix for example, but you can enjoy YouTube with an add-on extension.
For a very modest price you get a lot of value for money, and even though a Linux-based gadget may sound daunting, it is actually easy to set up and it can easily compete with many of the other, and more expensive, media boxes that we have tested so far. In some ways it is even superior.
Compare prices for Raspberry Pi 2 on Pricerunner
Price and retailer:
| US retailer | UK retailer |
| |
Apps is an evaluation of the app catalogue and the quality / user friendliness of the apps
Features is an evaluation of the built-in functionality and how useful it is, as well as build quality
User experience is an evaluation of user friendliness and the general use of the box, including the remote control
Total score weighted as: 40% Apps, 30% Features, 30% User experience.
All scores are calculated based on a moving maximum target, defined by what we currently consider the best on market. It is then presented as a percentage. This means that a score will fall over time as new and better media boxes set new standards. This allows you to compare scores across years. A score of 100% in a given category means that it is consider the best available media box in this category to date.
Open platform = lots of possibilities
Kodi runs smoothly
Powerful enough for 1:1 1080p video
Interface can be cutomized
Airplay (in OSMC)
Low power consumption
A bit ”nerdy”
No HD sound
Not really”smart”
On/off requires extra hardware